
Carpet tiles are a popular choice for both commercial and residential spaces due to their versatility, durability, and ease of installation. This guide will walk you through the process of installing carpet tiles, providing useful tips and tricks to ensure a seamless and professional-looking setup.
Tools and Materials Needed
Before starting your installation, make sure you have the following:
- Carpet tiles
- Tape measure
- Utility knife
- Chalk line
- Carpenter’s square
- Adhesive (if not using self-adhesive tiles)
- Roller (for pressing tiles firmly into place)
Preparation Steps
Measure the Room
Accurately measure the room to determine how many carpet tiles you will need. Add 10% to your total to account for cutting and waste.
Prepare the Subfloor
Ensure the subfloor is clean, dry, and level. Remove any debris, dirt, or protruding nails that might prevent the tiles from laying flat.
Plan the Layout
- Find the Centre: Use a chalk line to mark the centre of the room by snapping lines from the midpoints of opposing walls. Where these lines intersect is the centre.
- Dry Layout: Before applying any adhesive, lay out your tiles dry to plan the design and confirm tile orientation.
Installation Process
Laying the Tiles
- Start from the Centre: Begin laying the tiles from the centre where your lines intersect and work outward. This method ensures a symmetrical finish.
- Peel and Stick or Apply Adhesive: If using peel-and-stick tiles, simply remove the backing and place the tile down. For tiles that require adhesive, apply a thin layer of adhesive to the subfloor or the back of the tile as directed.
- Press Firmly: Use a roller to press down each tile, ensuring it adheres well to the subfloor and there are no air bubbles.
Cutting Tiles
To fit tiles around edges, corners, or obstacles:
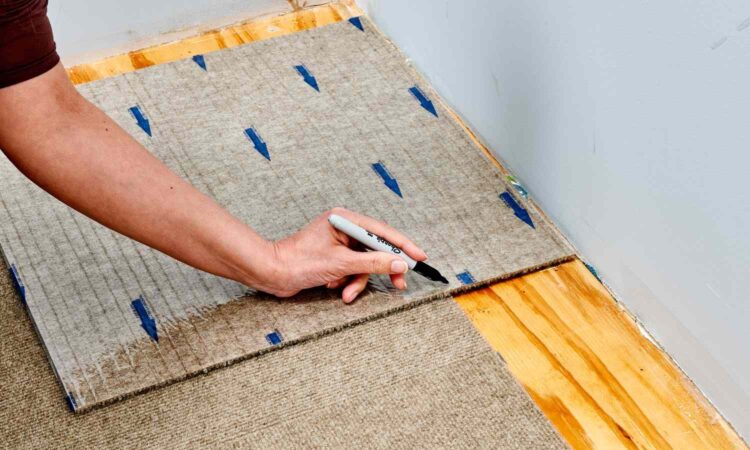
- Measure the Gap: Place a tile exactly over the last full tile nearest the wall. Then take another tile and press it against the wall, overlapping the tile you’re going to cut. Use this as a guide to mark where the cut should be made.
- Cut the Tile: Use a utility knife and carpenter’s square to cut the tile along the marked line.
Tips for a Professional Finish
- Check Alignment Regularly: Regularly check that the tiles are aligned correctly as you lay them. Misaligned tiles can be noticeable once the entire floor is laid.
- Handle Patterns Carefully: If your tiles have patterns or grains, make sure they all run in the same direction, unless a deliberate design choice dictates otherwise.
- Keep Spare Tiles: Save some tiles for future repairs. Carpet tiles allow easy replacement, but having a spare in the exact colour and pattern is convenient.
Installing carpet tiles can dramatically transform a space with minimal effort. By following these steps and tips, you can ensure that your carpet tile installation is seamless and professional. Whether you’re refurbishing an office or updating your home, carpet tiles offer a practical and attractive flooring solution that is easy to install and maintain.


