You already know a DIY wardrobe can save space and money. My goal here is to help you make stronger choices, plan faster, and avoid the fixes that slow most projects down. I choose recommendations based on fit, function, assembly time, and how well the system scales as your life changes. If you are comparing diy wardrobes nz options right now, use this guide as your working checklist and planning map.
I focus on practical layouts, simple install tips, and where you can get the most value without giving up quality. You will finish with a clear plan for your room, a parts list you understand, and a straightforward path to install.
Why DIY Wardrobes Work in NZ Homes
New Zealand homes often need flexible storage that fits tight spaces, sloped ceilings, and mixed room sizes. Custom joinery can look great, but it stretches budgets and timelines. Kitset wardrobes nz solutions meet you in the middle. You get durable parts, modular options, and the freedom to tweak the layout.
The win is balance. You can manage cost, keep control of the install, and still get a tidy finish that fits your space.
How I Judge Good Wardrobe Systems
When I look at wardrobe systems nz, I look for four things:
- Clear modules that stack and combine without wasted space
- Adjustable shelves and trim-to-fit rails to handle odd widths
- Solid fixings and straightforward guides that reduce install time
- Fast shipping and easy ordering through wardrobes online nz
If a system scores well on these, it usually leads to a clean install and a wardrobe that holds up.
A Smart Plan You Can Use in Any Room
Start with function. Your layout should match your clothes and gear, not the other way around.
- Short hang vs long hang: Count both, then allow extra space for growth
- Drawers vs shelves: Drawers hide smaller items and reduce visual clutter
- Shoes: Plan depth for your shoe style and the number of pairs you keep
- Seasonal gear: Reserve upper shelves for the bulk you touch less often
- Airflow: Leave small gaps above and below for ventilation
1. Measure width at three points and plan to the smallest number
2. Measure height at the left and right
3. Check depth against doors and skirting
4. Mark power points and switches
5. Note door type, hinges, and clearances
This avoids trimming surprises and lets you choose parts that fit the first time.
Room-by-Room Ideas That Work
Bedroom Reach-In
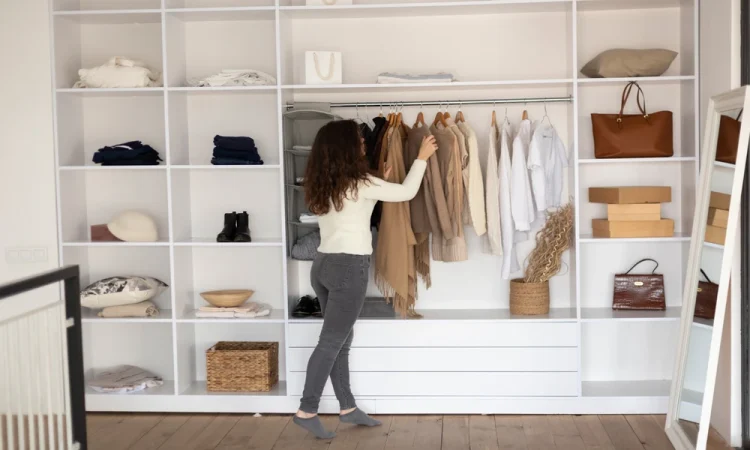
- Two short-hang rails left and right
- One central tower with drawers and shelves
- Top shelf full width for suitcases and linens
This handles most daily needs and fits typical NZ wardrobes.
Walk-In
- L shape: Towers on the long wall, hanging on the short wall
- Add one deep drawer stack for folded items
- Keep floor area clear for shoes or a bench
Use adjustable shelves to fine-tune as your wardrobe changes.
Kids’ Room
- Lower short-hang rail they can reach
- Cube shelves for labeled bins
- Room to add a second rail later as they grow
Simple changes now save you a full rebuild later.
Hallway or Linen
- Full-depth shelves for towels and bedding
- One shallow tower for cleaning supplies
- Hooks or a broom holder on the end panel
Keep the items you grab weekly at chest height.
Home Office or Guest Room
- One tower with drawers for stationery and tech
- Short-hang section for guest coats
- Top shelf for spare bedding
This keeps the room flexible without clutter.
Laundry or Utility
- Tall space for brooms and mops
- Ventilated shelves for quick drying
- Pull-out baskets for pegs and small items
Plan for moisture and regular use.
Why I Recommend Kitset Wardrobes
Kitset Wardrobes makes wardrobe solutions nz that hit the mark for DIY users who want durable parts and simple assembly. They offer:
- Pre-designed reach-in and walk-in kits that cover common room sizes
- Individual towers, drawers, shelves, and hardware to build your own layout
- Oversized top shelves and hanging rails you can trim on site for a tight fit
- A user-friendly 3D planner to map your space before you buy
- Clear install guides with the hardware you need in the box
- Nationwide delivery with many orders dispatched fast
This mix of customization and flat-pack pricing makes them a strong pick if you want quality without the cost of custom joinery. Feedback often highlights sturdy construction, accurate parts, and good support. If you want cheap wardrobes nz without risking flimsy components, their kits strike a useful balance.
Budget and Buying Online
If you want to keep costs tight, focus on what you need now and leave add-ons for later.
- Start with one tower and a double short-hang setup
- Add drawers only where you need privacy or better organization
- Use a top shelf across the full width for bulky items
- Order matching components from wardrobes online nz to keep the finish consistent
This staged approach keeps spend under control while you refine the layout.
Install With Confidence
You do not need special tools. A basic kit handles most installs.
- Tape measure, pencil, stud finder, spirit level
- Drill and bits, screwdriver, fine-tooth saw for trim cuts
- Safety gear, including eye protection
Tips that save time:
- Fix into studs where you can
- Pre-drill panels and rails
- Trim rails clean and de-burr edges
- Check level and plumb after each module
- Leave a small tolerance for walls that are not perfectly straight
Work from one side to the other and lock in each piece as you go.
Common Mistakes To Avoid
- Overspanning a hanging rail without a center support
- Skipping wall fixings in rentals and trusting friction alone
- Forgetting door swing and hinge clearance
- Packing shelves too tight and blocking airflow
- Mixing depths that cause doors to catch
Plan these out before you pick your parts.
Simple Upgrades That Make Daily Use Better
- Drawer dividers for socks, belts, and small items
- Pull-out shoe trays for pairs you use each day
- Soft lighting with motion sensors for dark corners
- Slim baskets for scarves and hats
- Hooks on end panels for bags
Small upgrades remove daily friction and keep the space tidy.
Care and Maintenance
You get the best return from a regular reset.
- Every six months: edit out what you do not wear
- Wipe shelves and check fixings stay tight
- Rotate seasonal gear to higher shelves
- Re-level drawers if flooring shifts over time
This keeps the system solid and your clothes easy to find.
Your Next Steps
- Define what you need to store and how you use it
- Measure your space using the checklist above
- Map a simple layout with a tower, short hang, and long hang
- Choose a kit or build a custom set with matching parts
- Install with care and add upgrades only where they help
If you want a reliable starting point, consider Kitset Wardrobes for flexible, well-built wardrobe systems you can install yourself. Their range makes kitset wardrobes nz practical for any room, and their planning tools help you lock in a layout that suits your space today and can grow with you tomorrow.